
A bathroom can have beautiful tile, a well-built vanity, and a new shower, yet still feel disappointing if the lighting is poorly planned. The best bathroom lighting layouts make morning routines easier, improve safety after dark, and show finishes in their true color. For homeowners planning a remodel in Sachse or the greater Dallas-Fort Worth area, lighting should be part of the design conversation from the beginning, not a last-minute fixture choice.
Start With a Layered Bathroom Lighting Plan
A well-lit bathroom usually needs more than one ceiling fixture. The most dependable layouts combine ambient lighting for general visibility, task lighting for grooming, and accent or safety lighting where it adds real value. Each layer has a different job, and relying on only one of them often creates shadows, glare, or dark corners.
Ambient lighting fills the room with an even baseline of light. Recessed ceiling lights, a central flush-mount fixture, or a combination of both can serve this purpose. Task lighting belongs at the vanity, where people shave, apply makeup, style hair, or put in contacts. Accent lighting may be used under a floating vanity, inside a linen niche, or above a feature wall, but it should support the room rather than compete with it.
The right balance depends on the bathroom’s size, ceiling height, natural light, wall layout, and the finishes selected. Dark tile and deep paint colors absorb more light than pale surfaces. A bathroom with a large window may need less daytime lighting, but it still needs a reliable plan for early mornings and evenings.
Best Bathroom Lighting Layouts by Room Type
There is no single layout that works for every bathroom. The most practical approach is to plan around how the room will be used and where people need clear, comfortable light.
Primary Bathrooms Need Defined Light Zones
A primary bathroom often includes a larger vanity, a separate shower, a tub area, and sometimes a water closet. This space benefits most from a layered plan because one central fixture will not reach every area effectively.
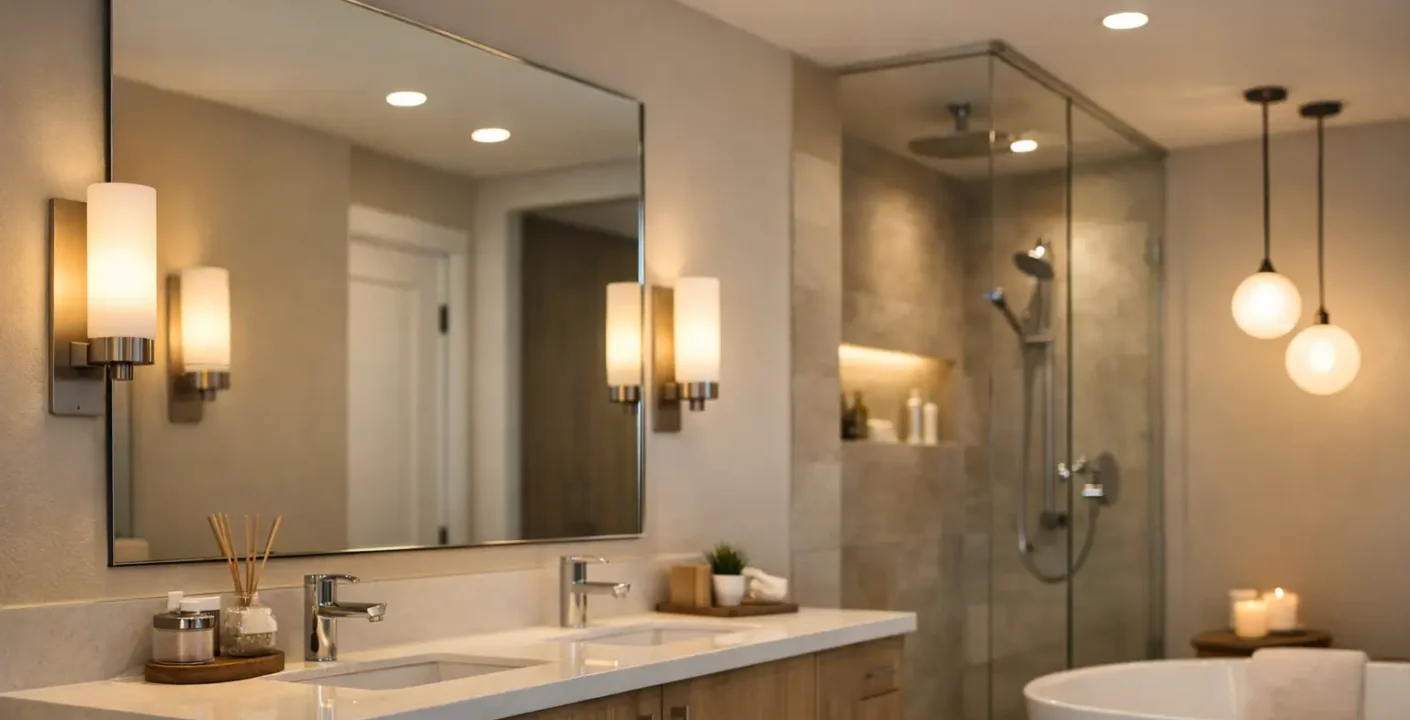
For a double vanity, place dedicated lighting at each sink position rather than treating the entire counter as one zone. Vertical sconces on both sides of each mirror provide the most even facial lighting. If wall space is limited, a well-positioned light above each mirror can work, although it is more likely to cast shadows under the eyes and chin.
Use recessed lights to provide general illumination across open floor areas, but avoid placing a recessed light directly over the person standing at the vanity. That placement creates a strong downward shadow exactly where clear task lighting is needed. A separate wet-rated recessed fixture in the shower is usually necessary, particularly when the enclosure blocks light from the rest of the room.
If the bathroom includes a freestanding tub, a decorative ceiling fixture can make the tub zone feel intentional. It should be sized and located carefully so it does not interfere with headroom, cleaning, or access. In many homes, a simple recessed light and a dimmer provide a more practical choice.
Hall Bathrooms Need Even Coverage in Less Space
Hall bathrooms are often compact, which can make homeowners assume a single vanity light is enough. In reality, these rooms need thoughtful placement because the shower curtain, enclosure, or door can create shadows quickly.
A common and effective layout includes vanity task lighting, one central ceiling light or recessed fixture, and a wet-rated shower light. If the bathroom has a narrow footprint, a ceiling fixture centered in the open walking area can provide good overall coverage. A bright vanity fixture then handles grooming tasks without making the room feel overly lit.
For a family bathroom, consider separate controls for the vanity and overhead lights. A child getting ready for school may need full brightness at the mirror, while someone using the room at night may prefer lower, more comfortable light.
Powder Rooms Can Support More Decorative Choices
A powder room does not need shower lighting, so the fixture plan can be simpler. It is also one of the best places to use a more distinctive sconce, pendant, or flush-mount light. Because guests often use this room, the lighting can help make a small space feel polished and welcoming.
Still, function comes first. A vanity light should illuminate the sink and mirror clearly, not leave the face in shadow. In a very small powder room, one attractive overhead fixture combined with a mirror light may be enough. If the room has dark wallpaper, wood paneling, or a dramatic paint color, choose a fixture with sufficient output rather than depending on decoration alone.
Vanity Lighting Placement Matters Most
The vanity is where lighting mistakes are most noticeable. A fixture placed too high, too far from the mirror, or only overhead can make routine tasks harder than they need to be.
Side-mounted sconces are typically the strongest option because they light the face from both directions. As a general guide, their centers are often installed around 60 to 66 inches above the finished floor, but the final height should be adjusted for the mirror size, vanity height, ceiling height, and the people using the bathroom. In a shared household, a layout that works comfortably for everyone is more valuable than following a single measurement without considering the room.
When sconces are installed on both sides of a mirror, they should sit close enough to illuminate the face evenly without crowding the mirror frame. On wider double vanities, each sink can have its own mirror and pair of sconces. A single large mirror may call for a different approach, such as evenly spaced vertical fixtures or a combination of side lighting and a carefully selected overhead fixture.
Lighted mirrors can be useful in bathrooms with limited wall space. They offer clean lines and can provide excellent face lighting when the light source is designed around the mirror perimeter. However, they should not automatically replace all ambient lighting. A bathroom still needs enough general illumination to safely use the shower, toilet area, storage, and floor space.
Plan the Ceiling and Shower Fixtures Carefully
Recessed lighting keeps ceilings visually clean and works especially well in bathrooms with low or moderately high ceilings. Placement should follow the room’s zones rather than a strict grid. Put light where it is needed: in the shower, near storage, over open floor areas, and around the toilet room if it is enclosed.
Do not install recessed lights so close to walls that they create harsh scallops or glare on glossy tile. At the same time, do not space them so far apart that the center of the bathroom is bright while the corners disappear. The fixture’s beam spread, ceiling height, and finish colors all affect the final result, which is why a remodel plan should address lighting before drywall is closed.
Any fixture installed in or directly above a shower needs the appropriate wet-location rating. This is not only a matter of performance. Bathrooms combine water, steam, and electricity, so proper product selection and professional installation protect the home and the people using it. Electrical work should also meet current local code requirements.
Choose Light Color, Dimmers, and Controls for Daily Life
Many homeowners prefer bulbs or integrated fixtures in the 2700K to 3000K range. This produces a warm, natural white light that works well with most bathroom finishes. Higher color temperatures can feel crisp, but very cool light may make a bathroom feel clinical and can change how paint, tile, and skin tones appear.
Color rendering matters too. A fixture with a Color Rendering Index of 90 or higher gives a more accurate view of makeup, clothing colors, and finish details. This is especially helpful at the vanity, where appearance-focused tasks happen every day.
Dimmers are one of the most useful upgrades in a bathroom remodel. They allow bright light for cleaning and getting ready, then softer light for evening baths or overnight trips to the bathroom. Consider keeping vanity lights, ambient lights, and accent lights on separate controls. The upfront cost is modest compared with the flexibility it adds over the life of the remodel.
Avoid These Common Lighting Layout Mistakes
The most frequent mistake is treating a bathroom like a bedroom or hallway, with one central fixture expected to do every job. That approach leaves the vanity underlit and makes the shower or toilet area feel dim. Another common issue is selecting fixtures based only on appearance, without checking their light output, location rating, and scale.
Oversized decorative fixtures can overwhelm a small bathroom, while undersized vanity lights can look lost over a wide mirror. Glare is another concern, particularly with exposed bulbs, glossy surfaces, and fixtures mounted at eye level. A good layout considers what users see when they look in the mirror, walk through the doorway, and stand in the shower.
Finally, do not wait until construction is underway to make lighting decisions. Moving electrical boxes after tile, cabinetry, or drywall installation can add avoidable cost and delay. At Oak Custom Remodeling, we encourage homeowners to review fixture locations alongside the vanity, mirror, shower, and ceiling plan so each decision supports the finished room.
The best layout is the one that fits the way your household actually uses the bathroom. Plan for clear grooming light, safe movement, and a comfortable atmosphere, then choose fixtures that make those everyday moments easier long after the remodel is complete.