A flawless interior paint job can elevate your space. But this job is not as simple as slapping on a coat of paint. House owners often make some common mistakes turning their project into a frustrating experience. It ultimately leads to uneven finishes, wasted time, and unnecessary costs.
Hence to help you out, in this blog, we’ve added ten common interior painting mistakes to avoid. Additionally, you can also learn how to fix them accordingly.
1. Skipping Proper Preparation
Preparation is essential. But unfortunately, people often overlook it. Failing to repair walls before painting can result in paint not clinging properly. Dust, grease, and old peeling paint create an uneven surface, which causes blotches or peeling later.
For example, if walls have cracks or holes, they’ll remain visible under the new paint unless filled with spackle and sanded smooth. Cleaning walls with a degreaser or mild soap solution ensures the paint sticks better. Remember, proper cleaning makes your painting smooth and gives a professional-looking finish.
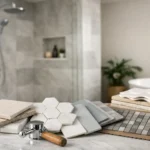
2. Choosing the Wrong Paint Type
Selecting the wrong paint for a specific room or surface often leads to a costly error. Paint types vary in durability, sheen, and ease of cleaning. For instance:
- Flat or matte paint works for low-traffic areas but shows scuffs easily.
- Glossy finishes are durable but highlight imperfections.
- Eggshell or satin finishes are ideal for high-traffic areas like living rooms.
Using bathroom paint in humid areas prevents mould or mildew growth, while improper selections can cause cracking or fading. Moreover, it’s been found that choosing paint with the right properties for each space ensures the job stands the test of time.
3. Skipping Primer
Skipping primer is undoubtedly a big mistake. Primer ensures the paint coats evenly and creates a neutral base for vibrant colour. Without primer, you may need extra coats to achieve coverage, particularly over dark or stained walls.
For example, painting over a dark red wall with light beige paint may require three or four coats without a primer. Additionally, primer seals porous surfaces like new drywall. It prevents uneven absorption. Also, studies found that primer can reduce paint consumption by up to 50%.
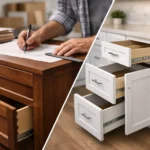
4. Painting Over Damaged Surfaces
Painting directly over a cracked wall would be a foolish thing to do! Damaged walls can cause paint to flake or bubble shortly after application. Hence, first, you must address issues such as nail holes, peeling paint, or old wallpaper residue.
Professional painters scrape off loose paint, fill gaps with spackle, and sand down rough patches for a smooth, durable finish. You should take time to repair surfaces. It ensures the new paint enhances your room rather than drawing attention to flaws.
5. Underestimating Lighting’s Impact
Lighting plays a significant role in how colours appear. Many DIY painters skip the step of testing paint colours under different lighting conditions. As a result, their chosen hue looks drastically different once applied.
For example, natural light makes colours appear brighter, while artificial lighting can create warmer or cooler tones. Experts recommend testing paint swatches on your walls and observing them throughout the day before committing to a colour. This step prevents the disappointment of a mismatched look.
6. Using the Wrong Tools
Inappropriate tools can ruin even the best paint. Using the wrong brush or roller results in streaks, uneven coverage, or wasted paint. For instance:
- Foam rollers can’t handle textured walls and leave an uneven finish.
- Brushes with stiff bristles may create noticeable lines on smooth walls.
Professional-grade tools like angled brushes for corners and rollers with the correct nap length ensure smooth application. Keep in mind; that high-quality brushes and rollers also reduce paint splatter and improve overall efficiency.
7. Applying Too Much Paint at Once
Overloading a brush or roller leads to drips, streaks, and wasted paint. Thick coats take longer to dry and are likely to crack or bubble. On the other hand, thin even layers create a smooth finish and allow the paint to dry evenly between coats.
Professional painters focus on quality over quantity. They apply two to three thin coats rather than rushing to complete a single thick one. This technique also reduces drying time and ensures a long-lasting finish.
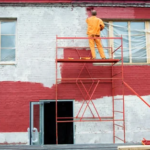
8. Ignoring Temperature and Humidity Levels
Painting in extreme temperatures or high humidity is a recipe for disaster. Cold weather can prevent paint from curing properly. On the other hand, high humidity slows drying time, causing smudges or bubbling.
Professional painters often advise painting at temperatures between 50°F and 85°F for optimal results. Using a dehumidifier or air conditioning in humid conditions can also help create the right environment for a successful paint job.
9. Using Cheap or Low-Quality Paint
Low-quality paint might seem like a budget-friendly option, but it often requires more coats, fades quickly, and chips easily. Hence, investing in high-quality paint can save you time and money in the long run.
Premium paints from trusted brands offer better pigment, coverage, and durability. They also come with built-in additives like mildew resistance or stain protection. According to professionals, premium paints may cost more upfront but typically last twice as long.
10. Skipping Clean-Up
Skipping or irregular clean-up after painting can ruin your house’s interior look. Dried paint drips on floors, furniture, or trim are challenging to remove. Moreover, neglecting to clean brushes and rollers reduces their lifespan while leaving lids off paint leads to dried-out paint.
Pro painters prioritize clean-up as much as application. They use drop cloths to protect furniture, tape to create crisp edges, and clean tools immediately after use. Please remember, that a tidy clean-up is the key to a polished final look.
How To Get It Right
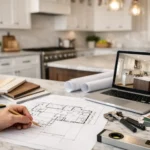
At Oak Custom Remodeling, we understand that a beautifully painted interior requires more than just a brush and a bucket of paint. Here’s what we suggest to ensure perfection every time:
- Expert Color Consultation: Always consult with an expert to choose colors that match your interior style, lighting, and the function of each room.
- Comprehensive Preparation: Discuss everything from repairing walls to applying primer, and everything so that the professionals will handle every detail with precision.
- Professional Tools and Techniques: Always prefer to use high-quality brushes, rollers, and sprayers to ensure flawless application, no matter the surface.
- Premium Materials: Make sure the professionals you hire use top-tier paints and primers to ensure longevity and a stunning finish.
- Detail-Oriented Execution: Do not rush! Take time with each step to ensure even coats, clean edges, and a polished result.
If you’re still not confident to start your interior painting, give us a call. We can help you with everything to give your house a beautiful look.